
In my previous post, we already made ourselves a little Todo Vue component and styled it with Tailwind CSS.
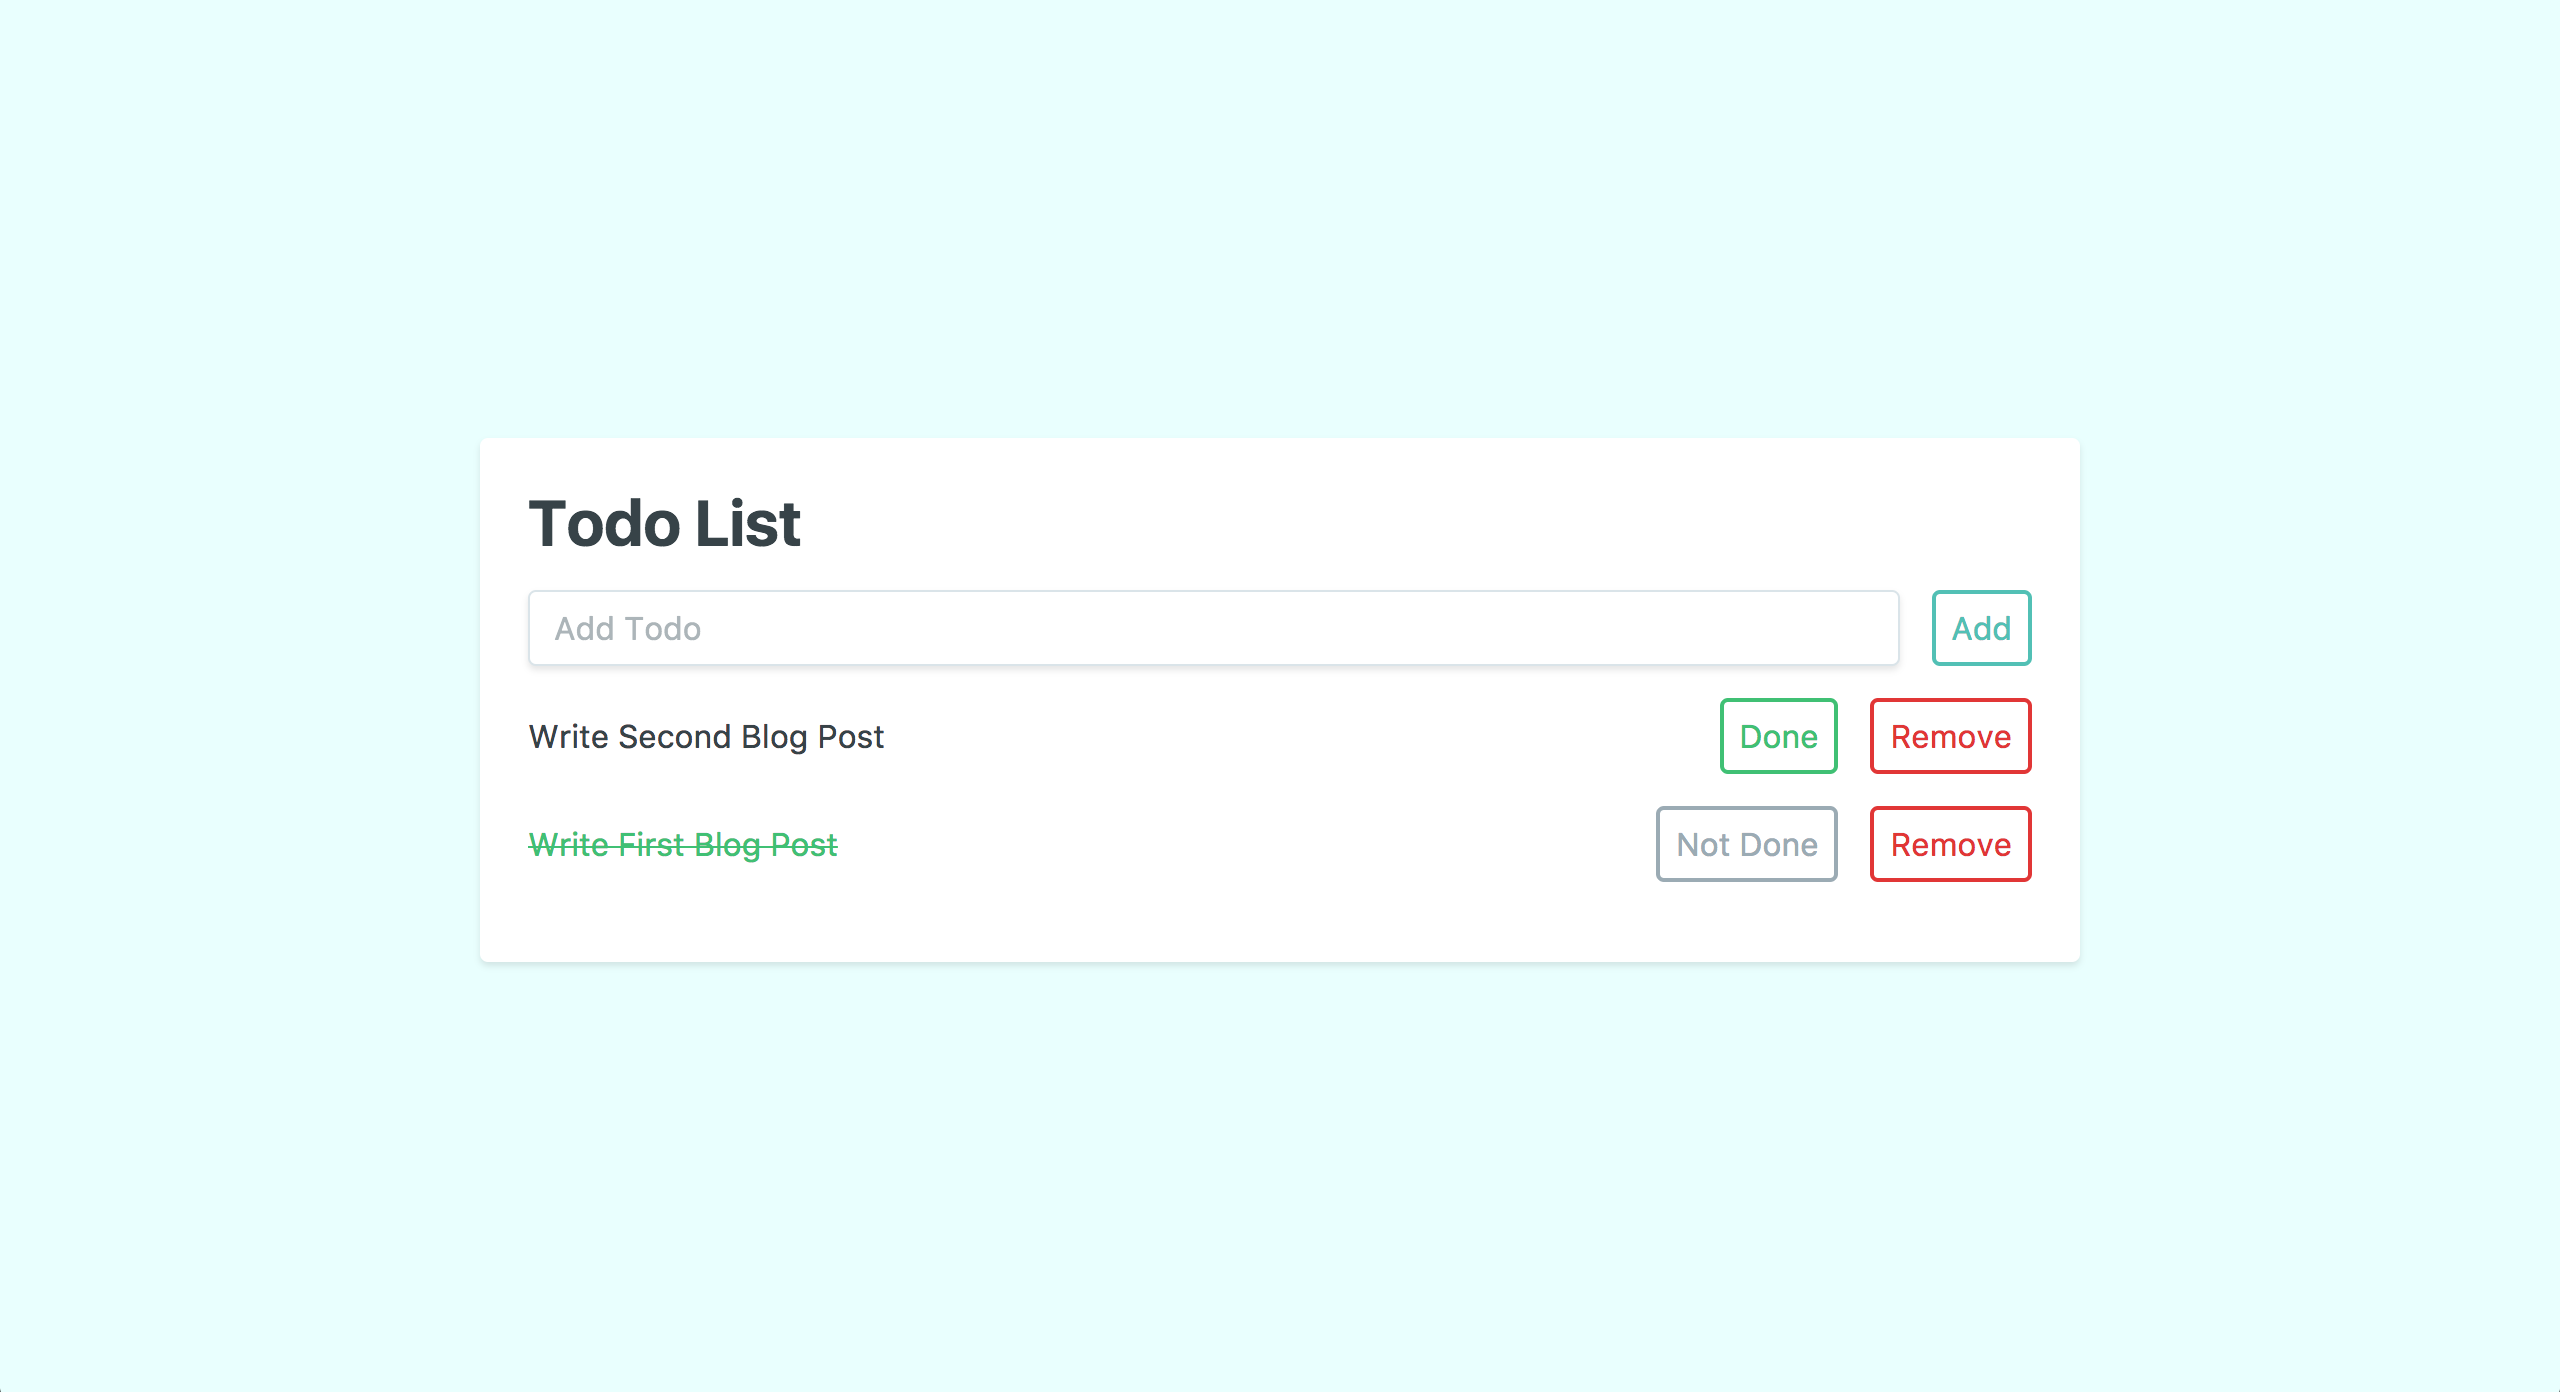
Let's continue to develop this app by fleshing out the backend with Laravel and MySQL. To follow along with this tutorial, you can download a copy of this project on GitHub.
Setting Up
We're going to need to create a MySQL database for us to use. To set one up, you can sign into MySQL by running the following command:
mysql -uroot -p
When it prompts you for a password, you can hit enter to continue. Now, we can simply create our database using MySQL. For this tutorial, we'll call our database tododb, and run this command to create it:
create database tododb;
Voila, we have a database! Next, we'll open up our existing Laravel project, and connect our database to our project in the .env file. Inside of .env, we'll see the following block of code:
DB_CONNECTION=mysql
DB_HOST=127.0.0.1
DB_PORT=3306
DB_DATABASE=homestead
DB_USERNAME=homestead
DB_PASSWORD=secret
We can update the DB_DATABASE, DB_USERNAME, and DB_PASSWORD to match our newly created database. So, our code will look liks this:
DB_CONNECTION=mysql
DB_HOST=127.0.0.1
DB_PORT=3306
DB_DATABASE=tododb
DB_USERNAME=root
DB_PASSWORD=
With that all taken care of, we've now successfully created our database and linked it to our Laravel project. Now, we can start working on our todos.
Building Our Todos
Laravel makes setting up our todos almost too easy. We can use the built-in CLI helper to scaffold all of the files that we're going to need. To do that, we can simply run php artisan make:model Todo -a from the command line in the root of our project.
This command has generated four files for us: a migration, a factory, a controller, and a model. Let's review each of them as we build out our app.
Database Migration
First off, we have migrations. A migration lets us define a database table's schema and save it in our source control. This is much easier than having to manually update our database when we need to change our data. Plus, we can keep a record of these changes so we can see how our data has evolved over time, or rollback to a previous state if something goes wrong.
In our project, we can find the migration we generated for our todos at database/migrations/<timestamp>_create_todos_table.php. For each migration, Laravel generates a unique timestamp prefix to ensure that the tables are added and removed in the correct order, so your file will have a slightly different value for <timestamp>.
Inside our migration, we can see the following code:
public function up()
{
    Schema::create('todos', function (Blueprint $table) {
        $table->increments('id');
        $table->timestamps();
    });
}
This is where we define our table's schema. For our todo, we know that we need an id, a text, and a finished column. We're provided with an id by default, so we can add the other two columns like this:
public function up()
{
    Schema::create('todos', function (Blueprint $table) {
        $table->increments('id');
        $table->longText('text');
        $table->boolean('finished')->default(false);
        $table->timestamps();
    });
}
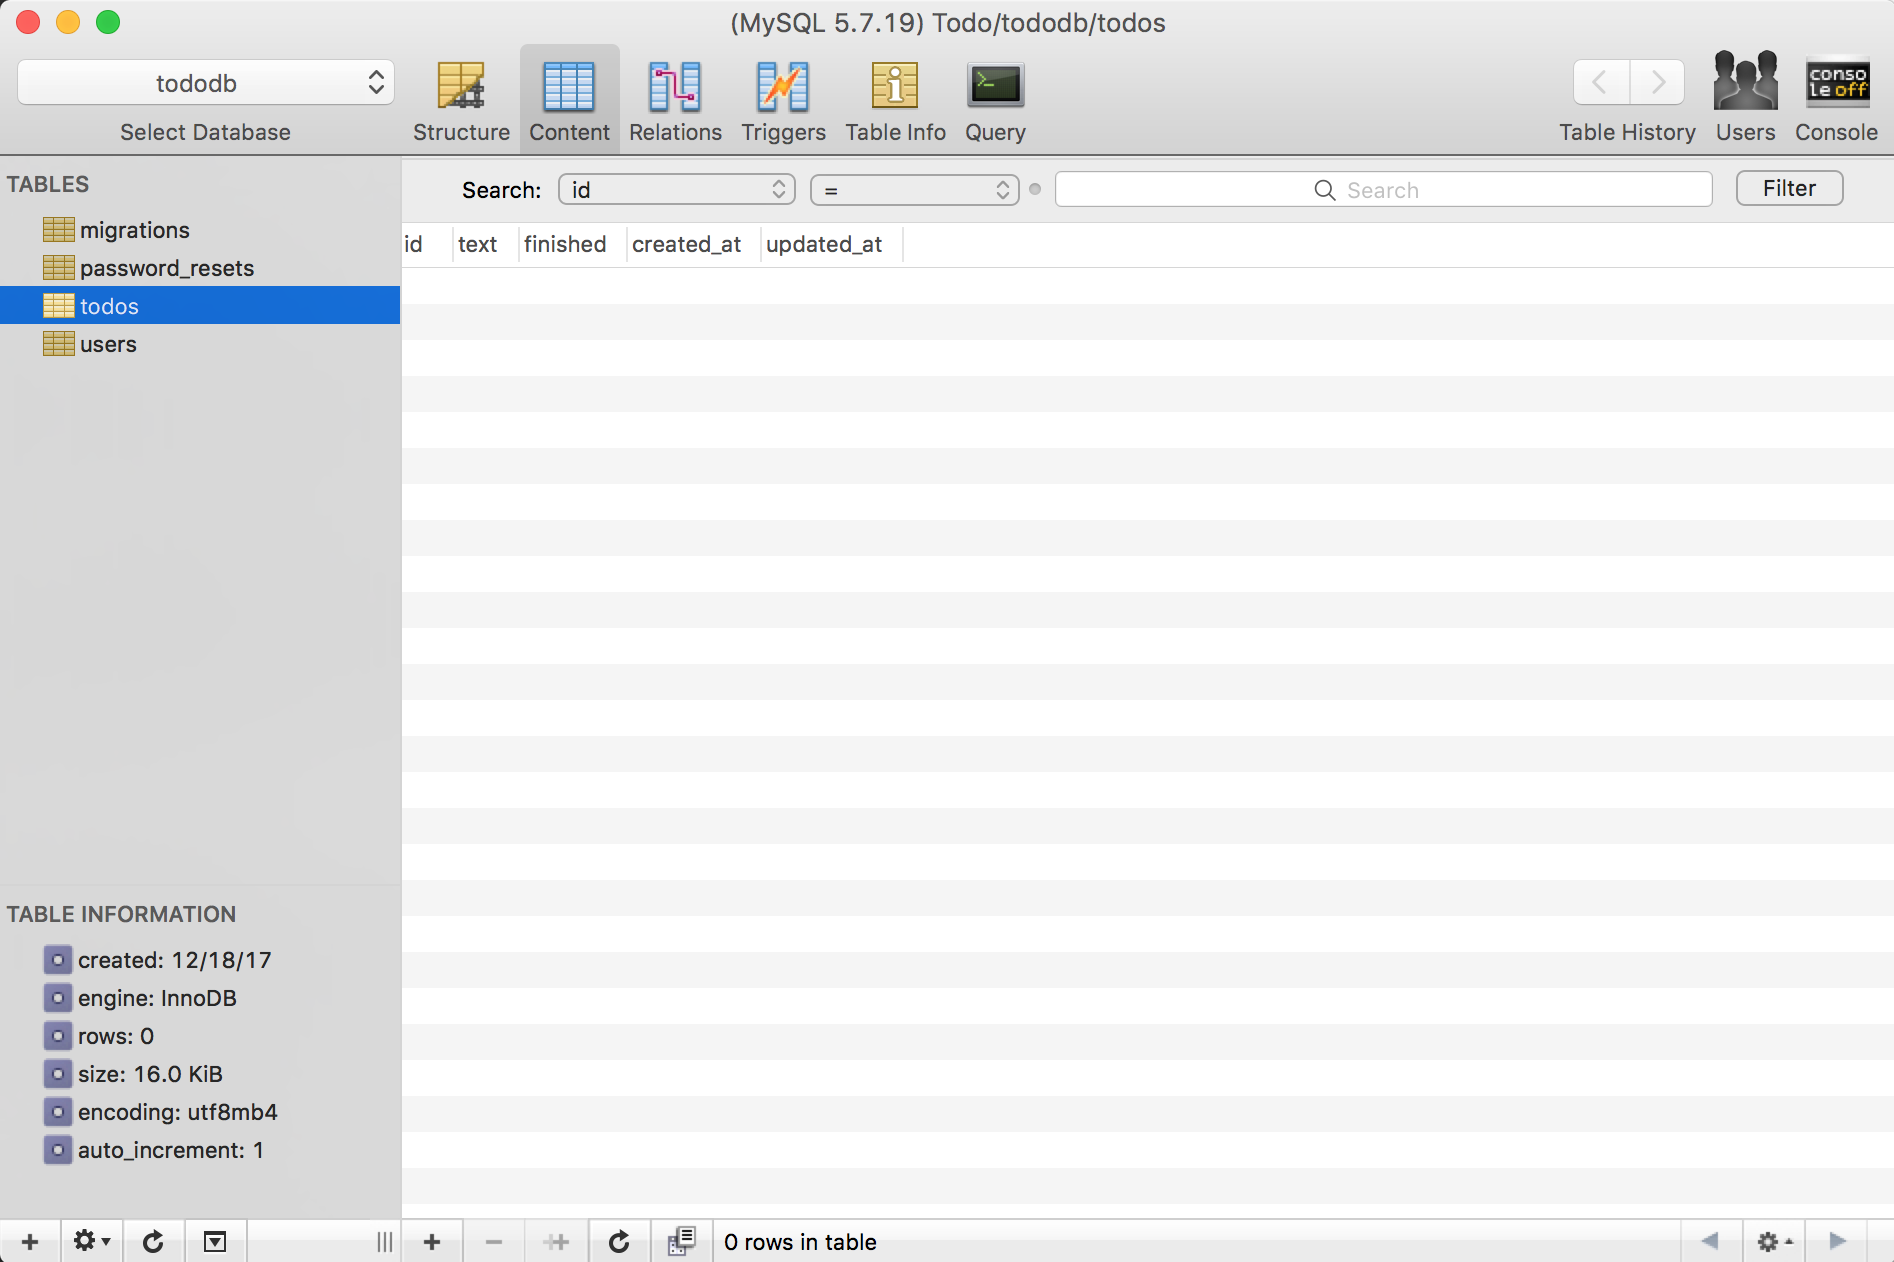
Now, we need to let our MySQL database know that we've defined this table. So, let's run php artisan migrate from our command line. Using a tool like Sequel Pro or the command line, you can see that our todos table has been created according to the schema we've defined.
With our migration set up, we can add a factory to populate our database with some dummy data.
Factory
Factories are useful for spinning up large amounts of dummy data. This helps a lot when we're developing because we can actually see how the data works in our application. Plus, if we're using test-driven development or TDD, we can use factories to create testable data.
Inside of database/factories we can see our TodoFactory.php. This is where we'll set up the factory using the great Faker package. Our file should look like this to start:
<?php

use Faker\Generator as Faker;

$factory->define(App\Todo::class, function (Faker $faker) {
    return [
        //
    ];
});
All we really need to add is the text of our todo. We don't need to worry about manually setting an id because Laravel auto-increments and sets that for us. For the finished column, you may have noticed that we defined a default value of false for that column. This means that whenever a new todo is added to our database, then we don't have to explicitly set the finished value if it's false. That just leaves us with the text column. We can set that up like this:
<?php

use Faker\Generator as Faker;

$factory->define(App\Todo::class, function (Faker $faker) {
    return [
        'text' => $faker->sentence,
    ];
});
And that'll take care of our factory! To see it in action, we can jump into tinker. Tinker is a Laravel package that allows us to experiment and manipulate our app's data from the command line. This is awesome when you just want to do some simple task like seeing how many todos there are in the database.
For now, let's hop into the command line and run php artisan tinker to start it. Once that's running, we can use our factory to generate a todo by running factory(App\Todo::class)->make(). This command just makes a todo but doesn't save it to the database. To save the todo to the database, we'll need to run factory(App\Todo::class)->create().
Let's add 5 todos to our database. We can do this by running factory(App\Todo::class, 5)->create(). You can see from the tinker output, that we've added 5 todos. Now, if we run an Eloquent query, we should see our todos. By running Todo::all() from tinker, we can see it returns a collection of todos. Pretty cool!
With our migration and factory done, we can now add dummy data that matches our schema. Next, we'll define our Model so Laravel can interact with our data easier.
Model
Models are probably the trickiest thing to wrap your head around as a Laravel developer. Essentially, a Model allows us to interact with our tables using the Eloquent ORM. In a Model, we can define what table columns we want to expose to our users, which columns we'd like to edit, create custom mutators, add helper methods, and much more. We'll keep it simple for this post, and just walk through setting up a typical Model.
In our app directory, we can see our Todo Model in Todo.php. As you can see, we have a basic PHP class.
<?php

namespace App;

use Illuminate\Database\Eloquent\Model;

class Todo extends Model
{
    //
}
By default, generated Models extend Laravel's base Model class. This is useful because it provides us with a bunch of functionality out-of-the-box. We can start to leverage this built-in functionality by adding a protected variable called fillable.
<?php

namespace App;

use Illuminate\Database\Eloquent\Model;

class Todo extends Model
{
    protected $fillable = [
        'text',
        'finished',
    ];
}
This is very important because by default Laravel protects us from mass-assignment vulnerabilities. In a nutshell, if we didn't explicitly say which fields we want to update, then a malicious user could update sensitive fields (like password or is_admin) on the fly. By defining our fields in $fillable, we're saying that these fields are allowed to be updated as needed.
We can also define attribute casts in our Model. This helps us out a lot by converting our database values into usable data types. For example, our MySQL database stores boolean values as a 1 or 0 like this:

While we can work with that, it would be much nicer to work with true or false. So in our Model, we can add the $casts variable and tell it to interpret the finished field as true or false.
<?php

namespace App;

use Illuminate\Database\Eloquent\Model;

class Todo extends Model
{
    protected $fillable = [
        'text',
        'finished',
    ];

    protected $casts = [
        'finished' => 'boolean',
    ];
}
Now, when we reference that attribute on our Model, we'll get the boolean that we expected. In the absence of any relationships, that wraps up our simple Todo Model. Let's move onto our Controller and make some data available to our Vue.js component.
Controller
Our Controller is located in the app/Http/Controllers directory as TodoController.php. When we ran our scaffolding command, Laravel set up this file as a "resourceful" controller. As you can see, we have much more boilerplate out-of-the-box.
The boilerplate helps us follow a RESTful pattern with our endpoints. If you're looking for more details on creating a REST API, the guy to look up is Phil Sturgeon. He's written loads of articles and a fantastic book that'll get you up to speed in no time.
For our simple app, let's focus on setting up our index() and store() methods. This'll let us see all of the todos and add new ones.
Our index() method will be fairly simple. We'll just return all of the todos like this:
public function index()
{
    return response(Todo::latest()->get(), 200);
}
This gets all of todos ordered from youngest to oldest. For our store() method, we'll need to do a bit more work. Right off the bat, you can see that we're passing in the $request.
public function store(Request $request)
{

}
The $request is where we can reference the data that we passed through with our POST. The first thing we'll do with the $request is validate that the data we need to create a todo is there. For this, we'll use Laravel's built-in request validator like so:
public function store(Request $request)
{
    $data = $request->validate([
        'text' => 'required',
        'finished' => 'required|boolean',
    ]);
}
This is checking that the text and finished fields are coming through in the request and that they're the appropriate type. Now, we can use the $data to create a todo.
public function store(Request $request)
{
    $data = $request->validate([
        'text' => 'required',
        'finished' => 'required|boolean',
    ]);

    $todo = Todo::create($data);

    return response($todo, 200);
}
Wrapping up that store() method, we simply return our newly created todo to add it to our Vue.js state. Now, we still have some Controller actions that need work, but I'm going to leave that as a practice exercise for you. Good luck!
Moving right along, we're finally ready to add some routes so we can access our Controller actions from our Vue.js component. Opening up routes/web.php, we can add the following:
Route::apiResource('todos', 'TodoController');
This takes care of defining each route for us. So, when we use tinker to see our application's routes we get the following:
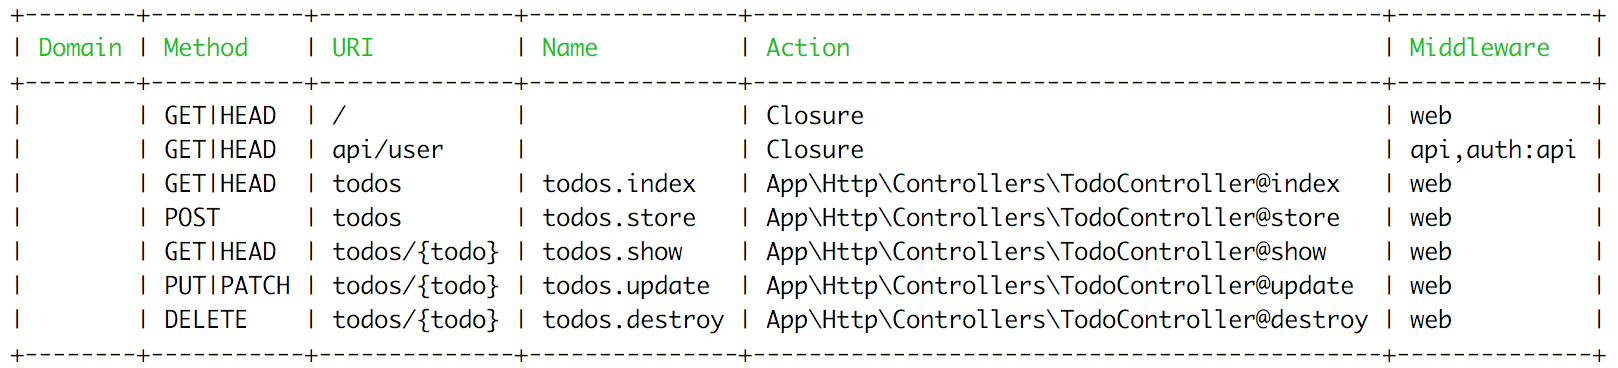
Of course, you can add individual routes if you prefer a more granular level of control. But, when dealing with resourceful controllers, I find using the route resource helpers saves me a bit of time.
Phew! That was a good chunk of work we just got through. We created our database and set up our Todos in Laravel. Now that we've wrapped up the "backend" of our app, we can hop into our Vue component and finish up our app.
The Frontend
Before we wire up our todo-component to our backend, let's take a moment to do a slight refactor. For starters, let's get rid of the "Done" button and add in a checkbox instead, like this:
<div class="flex mb-4 items-center" v-for="(todo, index) in todos" :key="todo.id">
    <input type="checkbox" class="mr-2" @click="updateStatus(todo)">
    <p class="w-full" :class="todo.finished ? 'line-through text-green' : 'text-grey-darkest'">{{todo.text}}</p>
    <button class="flex-no-shrink p-2 ml-2 border-2 rounded text-red border-red hover:text-white hover:bg-red" @click="remove(index)">Remove</button>
</div>
That'll clean up our todo a bit. Let's also have our new todo input add a todo when we press enter. To do that, we'll need to register a keyup event on the input and add some extra validation to our add() method so we don't enter empty todos. That'll look something like this:
//Input
<input class="shadow appearance-none border rounded w-full py-2 px-3 mr-4 text-grey-darker" v-model="newTodo" @keyup.enter="add" placeholder="Add Todo">

//Method
add() {
  const t = this;

  if(t.newTodo.length > 0) {
      let todo = {
        id: t.baseId,
        text: t.newTodo,
        finished: false,
      }

      t.todos.unshift(todo);

      t.newTodo = '';
      t.baseId++;
  }
},
Great! Compiling our JS, our component now looks like this:

Wire It Up
With our little refactor out of the way, let's start wiring up our component. To start, let's pull in the todos from our database. To do that, we'll just need to make an axios call during the created portion of our component's lifecycle. Let's add a getTodos() method to our component for that.
getTodos() {
  const t = this;

  axios.get('/todos')
      .then(({data}) => {
        t.todos = data;
      });
},
As you can see, we're simply making a GET request from the route we defined and then we're setting our todos with the data returned. Now, we just need to call this method in our created lifecycle hook to fire it.
created() {
  this.getTodos();
},
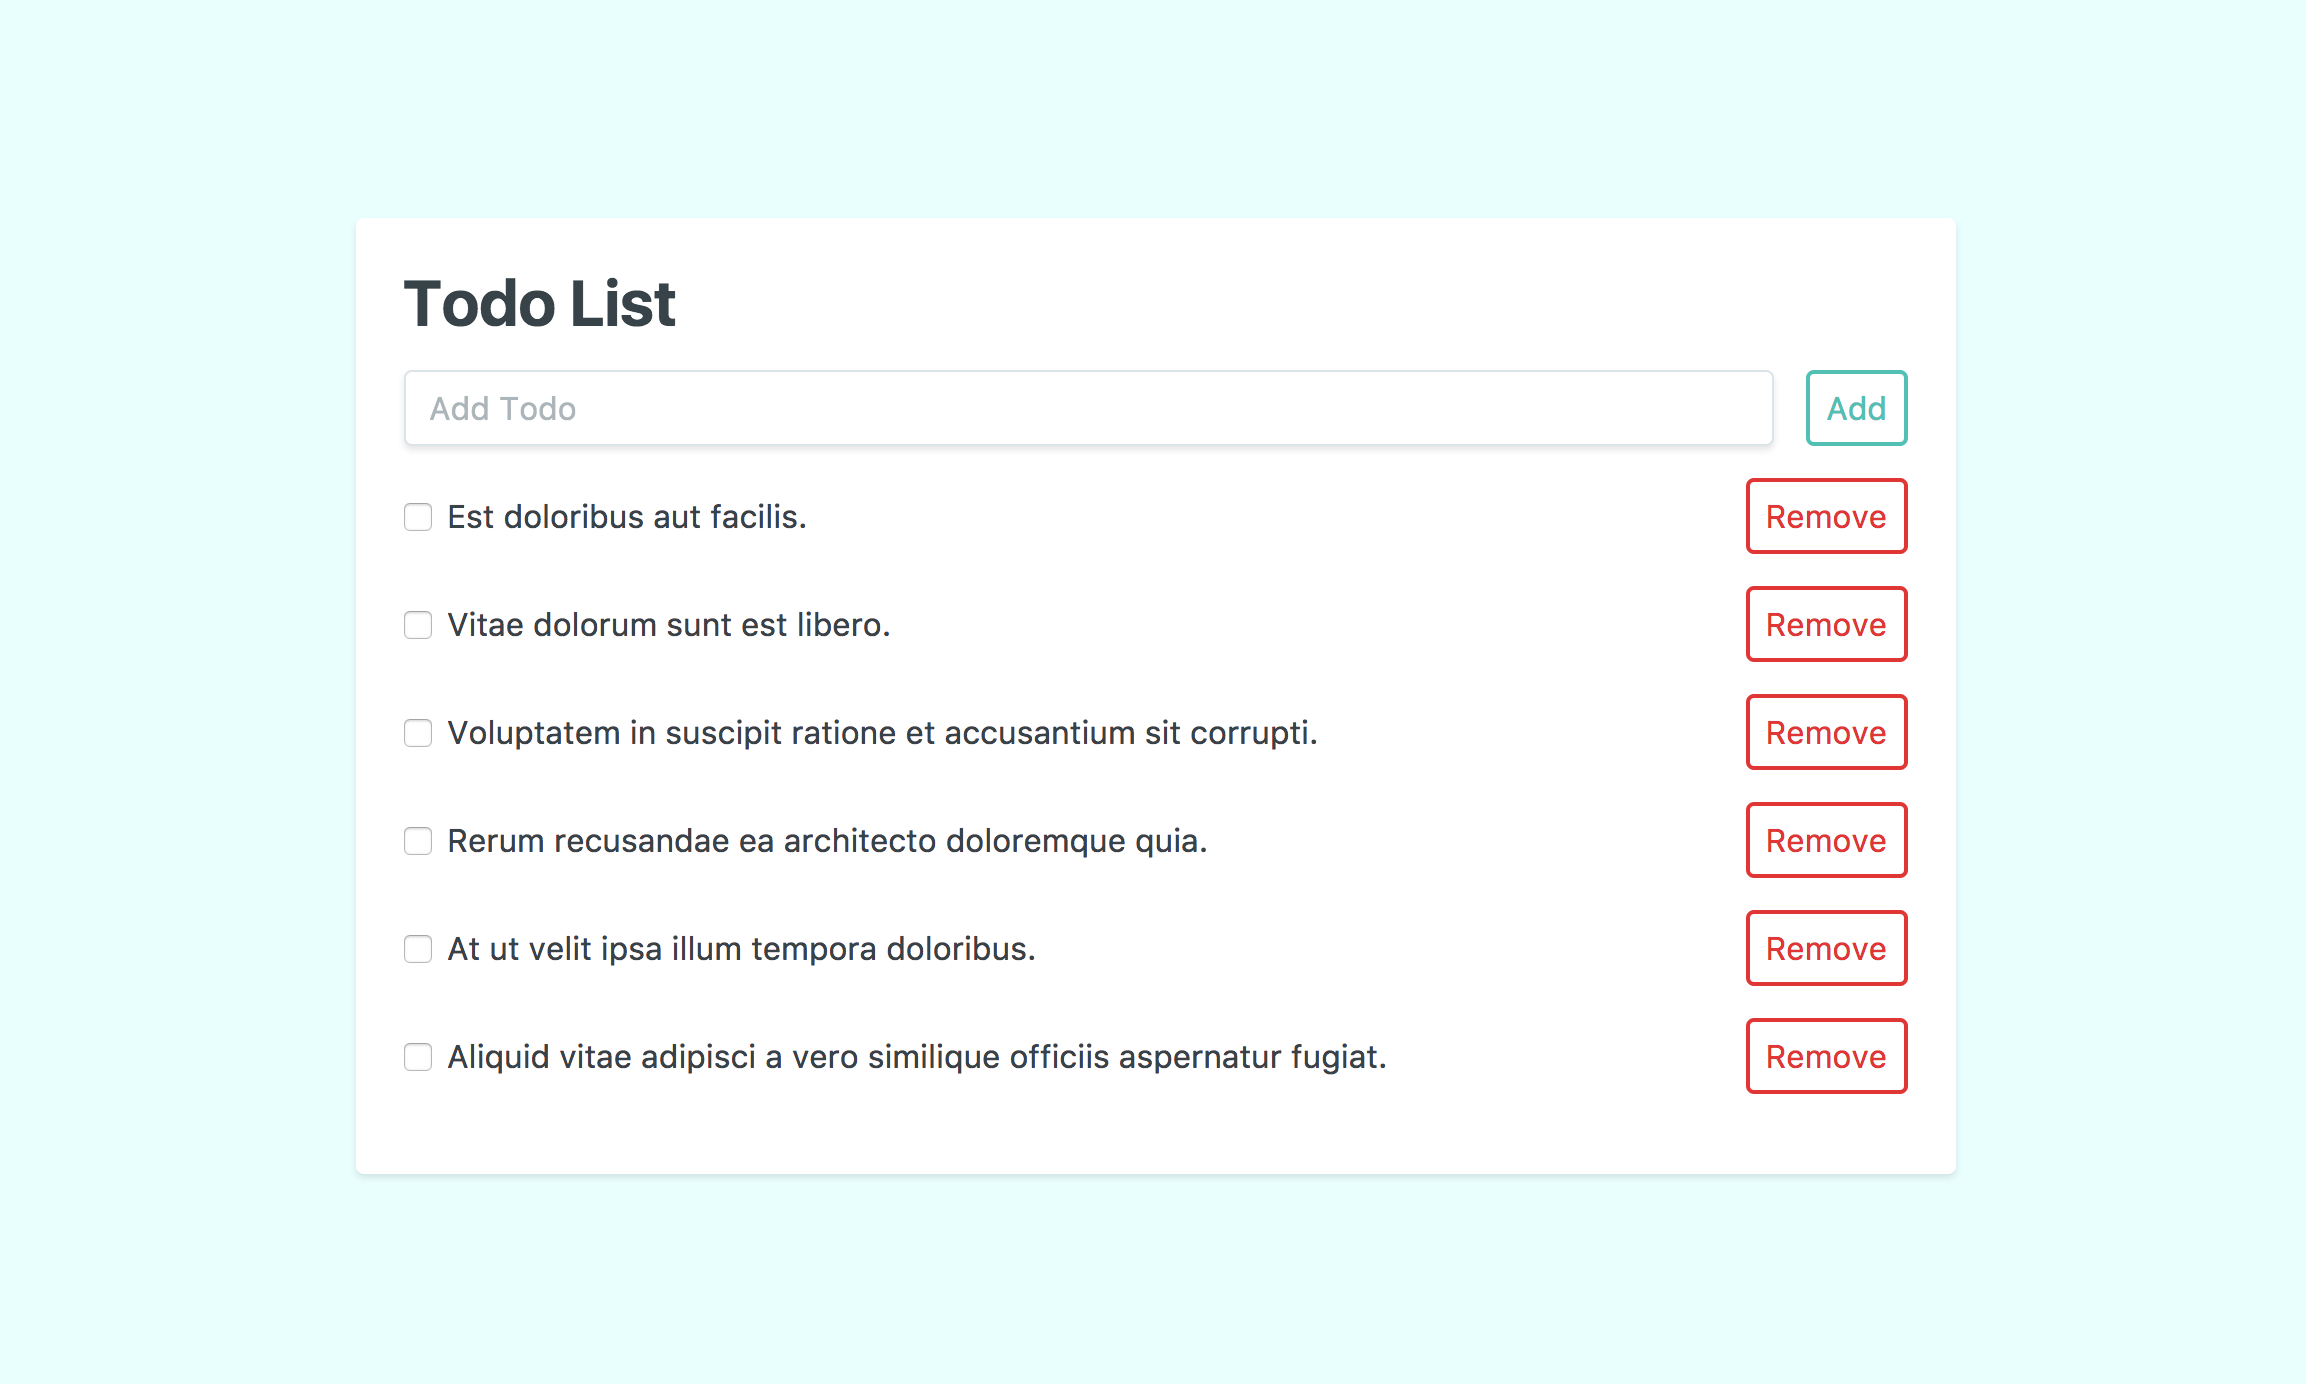
When we refresh our page, we can now see all of our factory todos are now populating our component!
Now, we just need to make a method to add our new todos. Fortunately, we already have the add() method set up, so we can just tweak it a bit. To make everything a little clearer, let's also create a separate method for our axios POST. Altogether, we'll have something that looks like this:
createTodo(text) {
    const t = this;

   axios.post('/todos', {text: text, finished: false})
        .then(({data}) => {
               t.todos.unshift(data);
        });
},
add() {
  const t = this;

  if(t.newTodo.length > 0) {
      t.createTodo(t.newTodo);
      t.newTodo = '';
  }
},
In createTodo(), we're just passing in the todo text and posting that over to our route. Then, once the todo has been created, we add the new todo to our local todos.
Inside of add(), we were able to remove the code responsible for adding the todo. Instead, we can focus on maintaining the state of our component. Also, we no longer need our baseId, so feel free to remove that from the data.
Bada bing bada boom! We're now adding todos to our database. As we add more todos, our UI gets a little wonky. Let's fix that quickly with Tailwind.
UI Tweaks
To start, we're going to need a custom max-height. Let's head over to our tailwind.js file in the root of the project. When we find the maxHeight setting, we can add the following property: 'screen-1/2': '50vh'. This helps us make sure our todo component doesn't grow too tall.
Back in our Vue component, we can add the max-h-screen-1/2 and overflow-y-scroll classes to the div that wraps our todos and empty state.
<div class="max-h-screen-1/2 overflow-y-scroll">
    <div class="flex mb-4 items-center" v-for="(todo, index) in todos" :key="todo.id">
        <input type="checkbox" class="mr-2" @click="updateStatus(todo)">
        <p class="w-full" :class="todo.finished ? 'line-through text-green' : 'text-grey-darkest'">{{todo.text}}</p>
        <button class="flex-no-shrink p-2 ml-2 border-2 rounded text-red border-red hover:text-white hover:bg-red" @click="remove(index)">Remove</button>
    </div>
    <div v-show="todos.length === 0">
        <p class="w-full text-center text-grey-dark">There are no todos</p>
    </div>
</div>
Finally, our component is ready for the big leagues.
The Wrap-Up
Wowzers! We certainly covered a lot of ground with this post. We created our MySQL database, built out our backend with Laravel, and wired it up to our Vue components. Plus, we did a little UI refactor to boot.
While we've done a lot, there's certainly plenty more to be done here. We have some controller actions that need finishing, we still need to persist our updates and deletes, and maybe a drag and drop ordering system would be pretty sweet too. Hopefully, we'll tackle all of that (and more!) in our next todo app post. As always, feel free to ask me any questions on Twitter. And until next time, happy coding!