Oftentimes, the hardest part of using test-driven development, or TDD, is getting started. You've got to download packages with weird dependencies, get your test suite working with your build system, and then you have to figure out how to write a test! It's no wonder that so many developers start running away when you bring it up.
But, you're no ordinary developer. You're ready to start using TDD with Vue so you can be confident that your code is working exactly as intended. Together, we'll get tests working in a new Vue project, walk through the default tests, and then add some of our own.
The Set Up
The easiest way to get up and running with TDD is to use the vue-cli tool. If you haven't used it already, the vue-cli tool scaffolds a new Vue project for you from the command line.
When you use the vue-cli to scaffold a project, all you have to do is follow the prompts and then tests will automatically be set up for you. How easy is that? Let's walk through the process so we can see exactly how to do it.
The first step is to install the vue-cli tool if you haven't already. Using NPM, you can open up your terminal and run npm install -g vue-cli to install it.
Before we create our project, we need to pick a template. The vue-cli gives us a couple of different template options such as webpack, browserify, pwa, and simple. Each of them has their own unique setups, and I'll leave it to you to choose the one that suits you best. Do note that the "simple" versions do not include testing. For this tutorial, I'm going to use the webpack template.
Now, navigate to the directory where you want to create your new Vue project. Here you can run vue init <template-name> <project-name> to scaffold your project. The vue-cli tool will now prompt you with a series of questions about your project, like this:
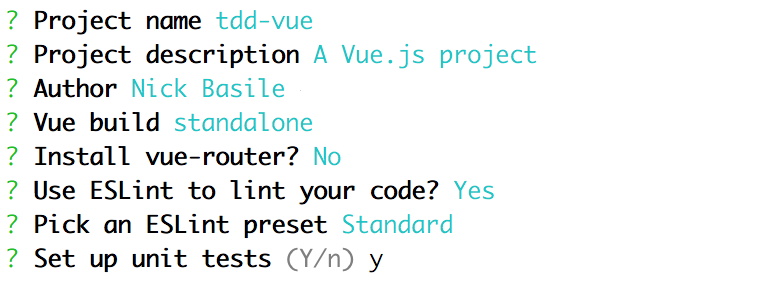
As you can see, I've accepted most of the default scaffolding settings, but I turned off vue-router because we won't need it. What you pick is up to you, but make sure you enable unit tests!
When you enable unit tests, you'll be asked to choose a test runner.
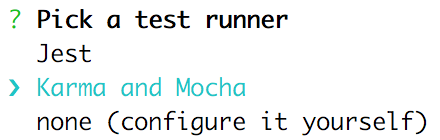
I chose Karma and Mocha because that's what I'm familiar with. But, I've heard great things about Jest and I definitely want to try it soon.
After that, the vue-cli will ask you if you want to set up end-to-end testing with Nightwatch. That's a little bit out of the scope of this "getting started" tutorial, so we'll say no for now. Finally, choose whether you want vue-cli to run npm or yarn after the install and it will generate the project for you.
Bada bing bada boom, we've got ourselves a new Vue project with tests already set up for us! If you cd into your project and run npm run test, we can see that the vue-cli has included some tests for us and that they're passing.
Taking a Look Around
Now that we're all set up, let's take a look around and see what our project looks like. Our file structure should look like this:
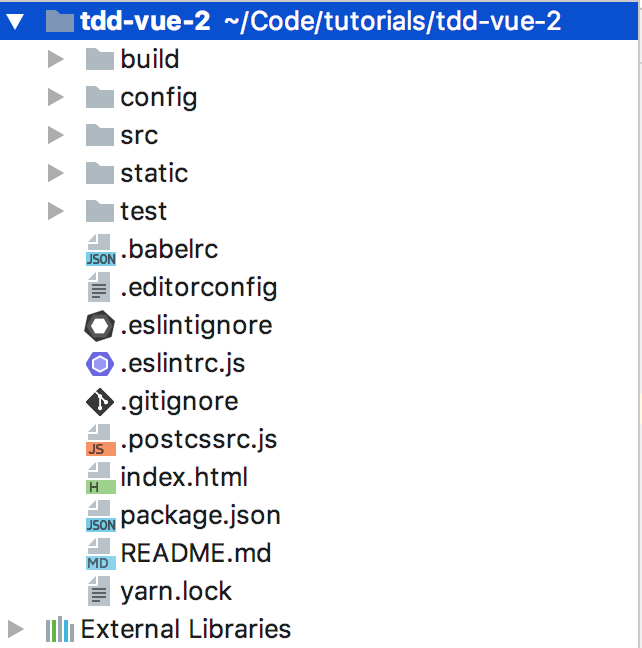
We can see that the vue-cli did a lot of work for us! While there's a lot going on here, for this tutorial, we only care about the test and src directories.
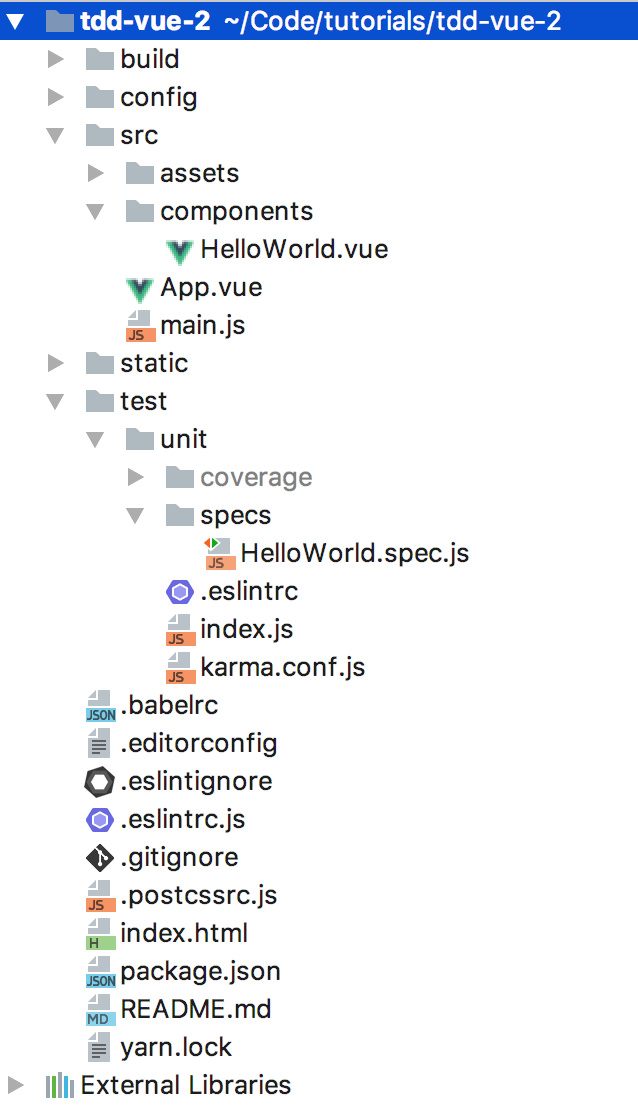
Inside of src, we can see that we have two Vue components and a main.js file. Then, inside of test, we can see some testing set up files and our specs directory. This is where we'll be writing our tests. Let's take a peek inside of HelloWorld.spec.js and see what we have.
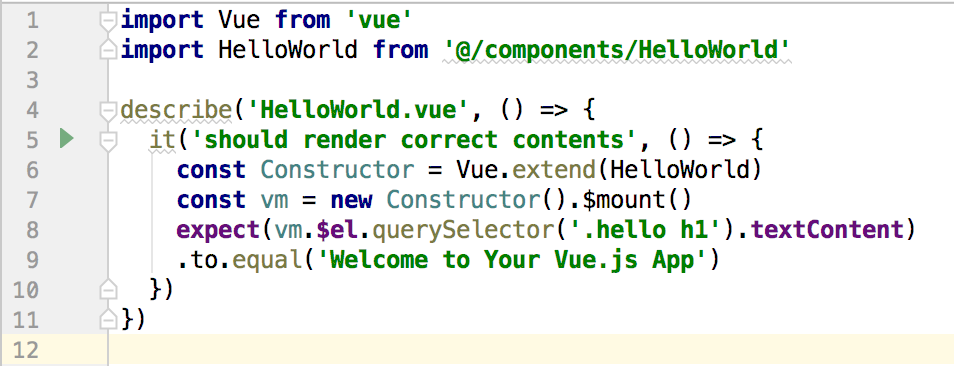
Let's break this file down piece-by-piece. At the top, we're importing Vue and our HelloWorld component so we can use them in the test. Next, we have our describe() function, which encapsulates our testing assertion. Our assertion is defined in the it() function. This is where we can see the test for our component.
If you're new to testing this can be a difficult concept to wrap your head around. The way I like to think about it is that our application's tests are like a big standardized test that we all took in primary school. Each describe() function is a different subject, and then each it() function is a question on that test. As you get more familiar with testing, I'm sure you'll come up with your own metaphor for writing tests.
Jumping back to HelloWorld.spec.js, we know our "subject" is HelloWorld.vue and that our test question is should render correct contents. So, how are we answering it?
First, we're using Vue.extend(HelloWorld) to create a subclass of the base Vue constructor with HelloWorld's options. Next, we instantiate HelloWorld so we can interact with it. In testing, this is commonly referred to as set-up or "building the world." Essentially, we're initializing our environment to match the appropriate state that we want to interact with during the test.
Finally, we're ready to look at our assertion. Here, we're expecting the text inside of .hello h1 to equal "Welcome to Your Vue.js App." Is that true? Well, if you've run your tests already, you know they pass. So, let's check out HelloWorld.vue to see how the code is set up.
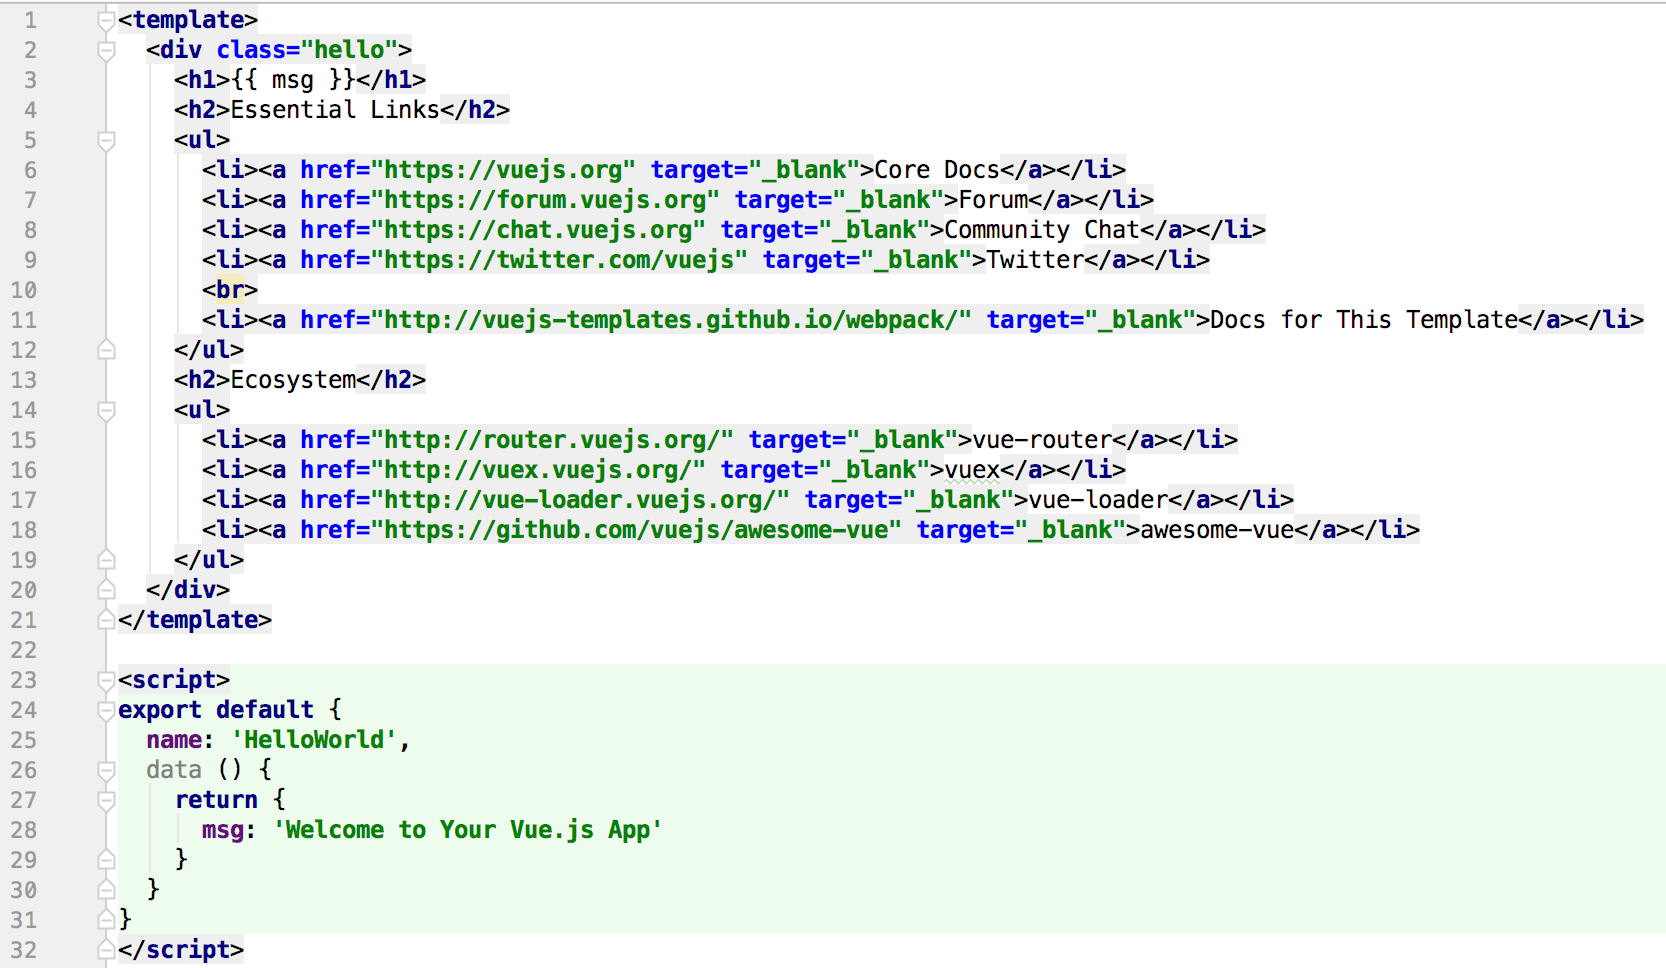
On line 3, we see that the h1 inside of .hello is rendering a msg from our Vue data. Then, on line 28 we see that the msg is the string that we expected: "Welcome to Your Vue.js App." Looks like our tests were right!
Writing a Test
Now that we're confident that our tests are working and correct, let's add one of our own. The first step in writing any test is always figuring out what we want to test. This is also the hardest thing to do and the part that's most open to interpretation.
There are many different strategies out there. I find that a good practice is to take a moment to think about what a given component should be doing and then write a test to verify it. I typically don't worry about "unit" testing every method or property. Instead, I focus on testing the behavior I expect from the component.
Let's take this approach with our HelloWorld component. What behavior do we expect from it? Well, we expect it to present a bunch of static information, and our current test covers that. If the dynamic msg doesn't render, then we can be pretty sure that there would be an issue with our content rendering. But, let's write a test to make sure all the links get shown on the page even if there's an issue rendering the msg.
To start, let's think about our test for a second. We want to make sure that all the links are showing correctly. So, let's write a test to make sure that we're rendering the correct number of links.
Back in HelloWorld.spec.js, right below our first it(), we can add another one like this:
it('should show all the links', () => {

})
Now, we need to build up our world like we did in our first test. So, we can add in the same consts that we have in the first one.
it('should show all the links', () => {
    const Constructor = Vue.extend(HelloWorld)
    const vm = new Constructor().$mount()
})
We want to make sure that all the links are on the page for our assertation. Let's try finding the count of all the links that our component renders and see if that matches what we expected. Inside of HelloWorld.vue we have 9 links, so we'd expect our component to render 9 links.
it('should show all the links', () => {
   const Constructor = Vue.extend(HelloWorld)
   const vm = new Constructor().$mount()
   expect(vm.$el.querySelectorAll('a').length)
   .to.equal(9)
})
When we run our test suite now, we can see that we're getting green! For a sanity check, try commenting out a link to make sure it fails like we'd expect.
The Wrap-Up
We've covered a lot in this walkthrough. We started by getting our project up and running with vue-cli. Then, we took a look at the default tests to see how they worked. Finally, we wrote our own test to make sure our component would work the way we expected.
While we covered a lot, this is just the tip of the testing iceberg. To continue learning about testing Vue I recommend that you check out Jeffery Way's Testing Vue course on Laracasts. Some other great resources are the Mocha Getting Started Guide and the Vue.js testing docs.
Of course, we all know that the best way to learn is to keep practicing. So, for your next project or brand new component, try setting up tests and giving it a shot. I bet you'll impress yourself with what you can achieve. If you get stuck, feel free to ask me any questions on Twitter. And until next time, happy coding!